
20 Ways You Can Filter and Sort Emails in Gmail
In the ongoing search for Inbox Zero – or whatever level of inbox maintenance you find comfortable – there are a ton of tools the average user leaves on the table. Gmail has made it easier than ever to filter through your emails, sometimes before they even arrive in your inbox. Here are 20 different ways you can filter, sort, and file away those messages far more quickly than manual sorting.
Creating a Filter
Many of the tips below will involve creating a filter. In the individual recommendation, I’ll be telling you what filter to create and how it can help. Rather than repeat how to actually make a filter every time, however, I’ll just cover that here. If you already know how to create a new filter in Gmail, you can skip this section.
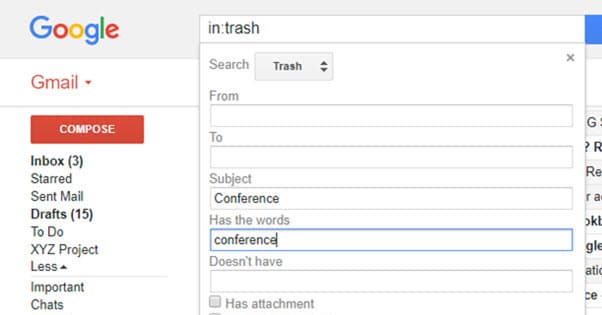
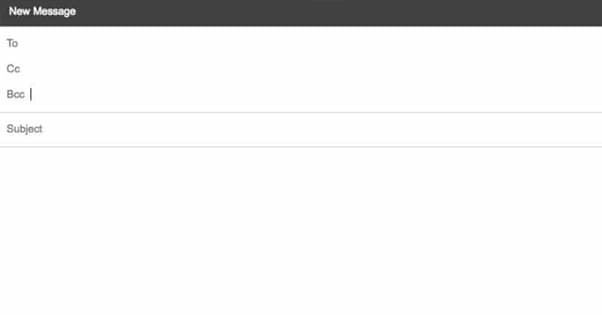
In Gmail, there’s a large search box up at the top of the screen. This is a pretty robust search on its own, and will come up later, but for now we’re only interested in the little triangle in the right corner. Click that, and a large box pops up with a bunch of advanced search options. This is your filter creation box.
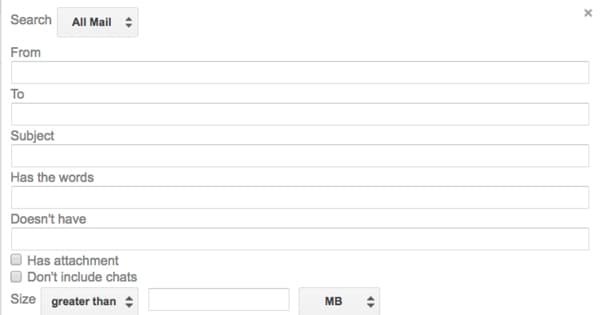
The filter box has a lot of different options. You can filter by the From and To fields, by subject line, by keyword and negative keyword, size of message or attachment, date ranges, and you can search individual mail folders or chats as well as your inbox or All Mail. Once you specify the filters you want, you can click Create Filter. This will allow you to choose the action taken when an email arrives matching the filter.
It’s worth noting that you can use search operators to make your filters as specific as possible. You can use OR, quotation marks, parentheses, and asterisks the same way you would use them in a typical Google search.
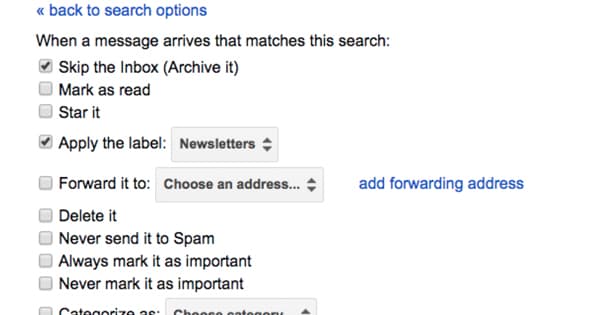
Possible actions include automatically archiving the message, marking it as read, marking it with a star or applying a label, forwarding it to a specified address, deleting it, making sure it never goes to spam, always or never marking it as important, and putting it in a category. You can also choose to apply the filter to past messages.
You can view your existing filters and edit or delete them from the settings menu.
1. Purge All Newsletters
Throughout daily usage of the internet, chances are you’ve ended up registered for a dozen or more newsletters. I know I’ve ended up on a few hundred lists. Any time you buy a product from a store, register for a seminar, or add your email to basically any list, you’ll end up on a newsletter distribution list. Worse, those lists are often sold, so people you didn’t give your email to will send you messages.
By law, legitimate newsletters and mass mailers need to have an unsubscribe link. You can go through and click them all, but it won’t catch everything. You can use a service like Unroll.me, but it only stops what you’re registered to right now. Adding a filter for the word “unsubscribe” with the action “delete” or even just “archive” will ensure that no newsletter will ever show up in your inbox, now and forever.
2. Search Operators
For a more advanced version, use the OR operator and add in other common newsletter phrases, like “view online”, “opt out” and “privacy policy”. Just make sure phrases you add aren’t commonly discussed topics in legitimate business messages.
3. Categorize Specific Senders
Maybe you don’t want something so broad-spectrum, and simply want to file away messages from specific senders.
This can work for newsletters, but also for simple status messages from an automated system. Open up one of the existing emails and find the three vertical dots to the upper right of the message. One of the options will be “filter messages like this.” This will open up the filter box with the sender already added to the From field. From here, you can take any action you want, ranging from deleting the messages to marking them as important.
4. Categorize Sender Domains
Maybe you get a lot of messages from one specific domain, but from numerous senders. Maybe the sender randomizes their From address to avoid filters. In this case, it’s simple. Just add a *@domain.com to the From section. This will catch everything from the sender’s domain, regardless of who specifically sent the message.
5. Blogger Emails
An advanced use case for this applies when you’re a blogger. Whenever you get a new comment, trackback, or pingback, WordPress (and most blogging systems) will send you an email. YouTube will do the same with video comments, social networks with follow notifications, and so on. Set up filters for these senders and automatically label the incoming messages. Something like follow notifications can be automatically purged. Comments or Trackbacks can be added to your task list to moderate them.
6. Skip the 30 Days
Gmail automatically deletes any message in the spam folder once it passes 30 days in age. However, this still leaves a full month in which you might click into your spam folder, click on some vaguely legitimate looking message, open some invoice.pdf.exe attachment, and cryptolock your computer. Rather than exposing yourself or your network to this risk, add a filter. In the keyword field, type “is:spam” to get a list of everything in the spam folder. Under action, choose “delete it.” This will automatically delete any message that ends up marked as spam, whether Gmail does it on its own or you do it manually.
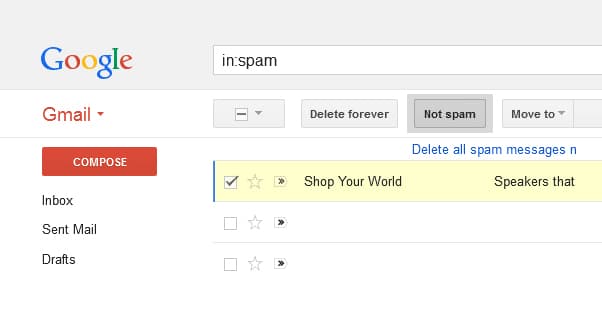
Be aware that Google’s spam filter is adaptive. If you ignore messages from a specific sender often enough, Gmail may start adding them as spam. There are a few other reasons legitimate messages end up in spam as well. This rule will delete them, before you see them, so make sure any important message is reaching you whenever possible.
You do have a bit of a grace period, though: anything “deleted” from Gmail is instead sent to a Trash folder. This, like the spam folder, is automatically purged after 30 days, but you can choose to empty it immediately instead.
7. Build a Task List
Some of the Gmail add-ons I covered a while back allow you to sync Gmail with a calendar or task app to manage to-do lists. You can also opt for a lower-tech solution, though. Create a new Label in Gmail specifically for your task list. Now create a new filter, and in the From section, put in your own email address. For the action, choose Skip the Inbox and Apply the Label with the task list label.
Now when you think of a task you need to do, a video you want to watch, an article you want to read, or anything similar, simply email it to yourself. It will be filtered directly to that label, which you can use as a task list, archiving or deleting any message once you’ve finished the task.
8. From Filters
For an advanced version, add other From senders, like your boss or a vendor that sends you expiration or billing notices.
9. Self BCCing
This is another advanced option you can use with the task list functionality. Let’s say you send email regularly and want to follow up with people who haven’t responded. When you send them a message, BCC yourself.
This will send the message to your task list as well. You can then keep an eye on the conversation. If the recipient responds, you’re good to go. If they don’t, the message in your task list will remind you to follow up.
10. Nuke the Archive
Gmail allowing you to archive anything instead of deleting is encourages a lot of digital hoarding. “But what if I need this later?” you cry, gently caressing a list of messages from 2005 that you didn’t read back then and haven’t read since.
Just get rid of them! The filter Date section makes it look like there’s no way to choose everything before X date, and that’s true using that field. Instead, use the keyword field, and type “before:2010/01/01” or whatever date you want to use. This will show you everything from before that specific date. As far as the action is concerned, choose Delete It and Apply Filter to Matching Conversations. This will purge all of those old messages.
One important note! Some industries, like law firms, have strict legal restrictions on records retention. Don’t delete emails in violation of your retention policies, or else you can be fired and even potentially prosecuted.
11. Create a Kill File
No, we’re not making a list to refer to a hitman or anything. For a Kill File, you want to make a filter that includes a series of email addresses in the From filter, with the action being to skip the inbox and automatically delete the message.
This is similar to the anti-newsletter filter, but you can maintain it by adding new addresses whenever you like. Corporate, individual, or anything in between, if someone spams you too much, add them to the filter.
12. Free Up Space
Gmail may have a huge amount of space available to even free users, but it’s still limited.
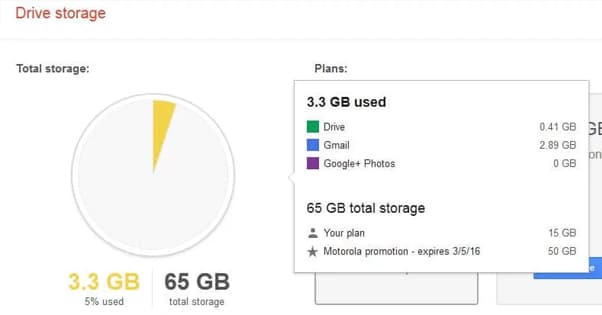
Email attachments can eat up a lot of that space, and typically after a few years, you don’t need them any more. Create a new filter and specify any attachment size over, say, 10 KB. This will find basically everything except tiny text documents, and you can go through and choose whether or not to delete the emails. If you want EVERY attachment, use “Has:attachment” in the keyword field instead. If you only want to delete larger files, set a larger file size.
13. Delete Certain File Types
Let’s say you and a friend, years and years ago, shared music with one another. Now you want to clear your email account to free up space and remove some evidence of old music piracy. Use a filter for “filename:mp3” and you’ll immediately see all messages with MP3s attached. Download the ones you want to keep, I suppose, and delete the rest. You can do the same with any file type.
14. Forwarding Backups
There are a lot of good backup options on the web, like Drive or OneDrive or Dropbox for data, but fewer options for backing up emails. A program like Outlook uses PST files you can back up, but Gmail has nothing of the sort.
Let’s say you want to clear your account, but you don’t want to delete the messages. What do you do? Create a new account! Something like accountname.backup (at) gmail (dot) com works just fine. Now, when you want to back up a message, simply forward it to your backup email address and delete it from your primary address. It’s low-tech and kind of goofy, but it works.
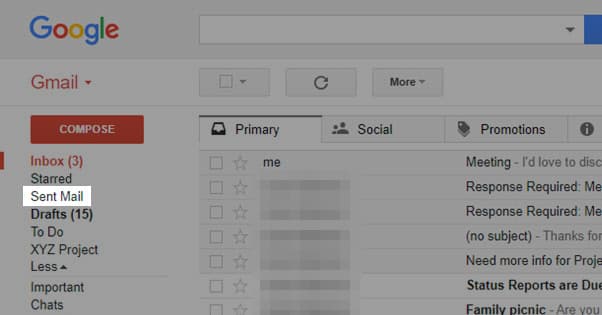
15. Purge Sent Messages
One way that data and clutter can add up is in sent mails. Gmail doesn’t just keep everything you’ve received, it keeps everything you’ve sent as well. You can do any of the filters I’ve mentioned above, like the attachment filter or the date filter, and add in “in:sent” to pick specifically the messages you have sent. From there, delete them.
I make no guarantees about how this will break conversation threads and nested emails. I’m not sure how Gmail specifically handles it, actually. My guess is that the conversations will remain nested, but your replies will be removed.
16. Whitelist Messages
Let’s say you work in email marketing, so you commonly use terms like unsubscribe in your daily communications, but you still want to use the newsletter filters up above. You can avoid accidentally filtering crucial messages from your boss by whitelisting them in the filter. Here’s how.
First, add a new filter with From: Your Boss. Set it to apply a label and name the label NoDelete. Now whenever your boss – or your kid, or your best friend, or your coworker, or whoever you add to this list – sends you a message, it will be automatically added to this label.
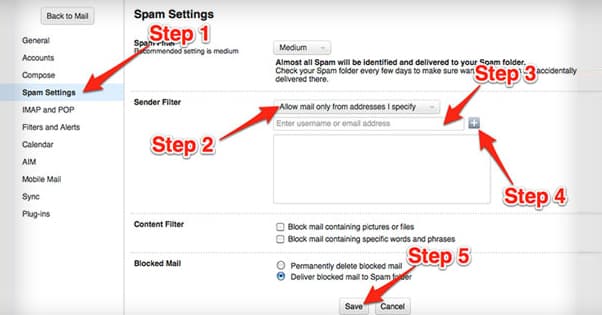
This alone won’t do anything. A label is just a label, after all. The message will be nicely labeled in the trash. Now go back to your initial anti-newsletter filter and add in “-NoDelete” in the keyword section. This is a negative keyword (you can also add NoDelete to the “doesn’t have” section) and will exclude those labeled messages from your filter.
17. Keyword Specific Filters
As an advanced version of the whitelist, you can specify newsletters and other mass mails you want to keep in the same way. Don’t use a keyword like Unsubscribe, but rather add the email address or the sender domain you want to whitelist.
18. Filter the Carbon Copies
The CC field in email comes from the phrase Carbon Copy, which you may have seen in real life. They’re the layered pieces of paper where you write on one, and a carbon sheet between it and the second page copies your writing to another copy of the form. In email, it’s used to copy someone on a message. BCC is a Blind Carbon Copy, by the way, which simply means each recipient can’t see the other recipients in the message.
Often, when you’re CCed in a message, you don’t actually need to care much about it. They tend to be department-wide messages and notices more than anything. If this is the case for you, add a new filter and, in the keyword section, type “cc:youraddress (at) domain (dot) com”. Now whenever you’re not the recipient but you’re in the CC field, that message can be dealt with. Delete it, add it to your task list, filter it to an archive and a label, whatever you want.
19. Star Important Messages
Sometimes you want specific messages, like tax payments, critical system notifications, messages from your boss, or billing notifications, to be given priority.
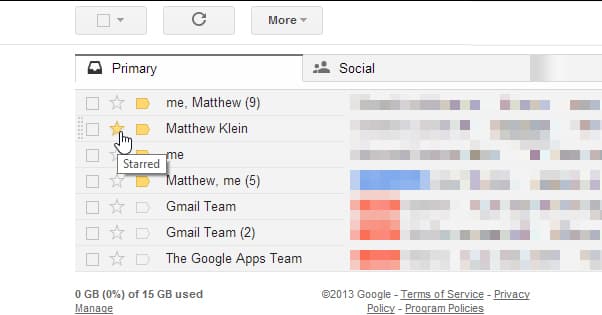
You can use the same tip as the one for creating a task list, but add on the “star it” option. Now you can address the starred messages in your task list with priority.
20. File Away Specific Records
Rather than needing to search every email you’ve ever received when you want to look up a piece of data, use a filter for specific kinds of records using keywords like “order number” or “receipt”. Add them to a specific new category, which you can then browse like its own inbox tab, or search through when you want to find one piece of data from a sender that also sends newsletters and other mass messages.