
How to Keep Mac Mail From Getting Slow Over Time
One of the biggest problems with stand-alone email clients – rather than web-based clients like Gmail – is that they accumulate issues over time. Both Outlook and Apple Mail suffer from this gradual slowdown.
If you’re using Apple Mail, or Mac Mail as many call it, it is probably slowing down, or it could be intolerably slow already. Or, maybe you just want to put a little preventative maintenance into your schedule. I have a bunch of tips for you, though they might not all apply at once. Give ’em a look!
Verify the Problem
The first thing you should do is check to make sure the reason your computer is acting slow is because of Mac Mail. Sometimes there are other problems, anything from hardware issues to software memory leaks eating up system resources.
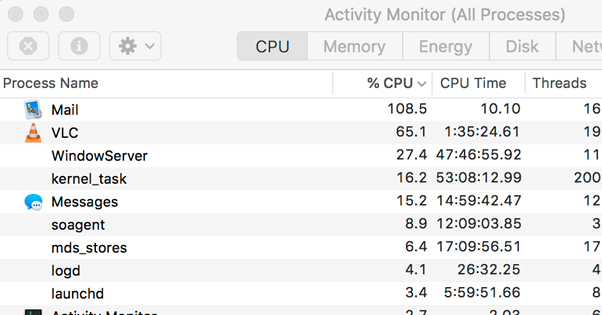
Hit Command-Space and type in Activity Monitor in the launch window. Monitor the various apps you’re running as you load up Mail. Chances are, Mail is eating up a bunch of system resources. If not, you might have another problem, in which case the tweaks I’ll mention won’t help you immediately.
If it doesn’t look like Apple Mail is the culprit, you can still put these tips to use. They just won’t solve your problem completely. Other issues you might look at include checking to see if your hard drive is filling up, checking to make sure your RAM is functional and sufficient to run your desired apps, and checking for viruses.
Viruses are a common problem among Apple users. For decades, Macs had a reputation for being a secure platform. Some argued that it was inherent to the platform, others credit Apple with building robust security, and some claim it’s simply due to the smaller audience – making Apple computers a less valuable target for virus authors. Despite all of that, Apple devices are susceptible to viruses just as much as Windows PCs are, though they may not be the same viruses across all platforms. It’s always worthwhile to maintain virus protection.
Anyways, all of that is outside the scope of this post. Assuming Mac Mail is the culprit for a slow machine, or even just performing slow itself, here are some actions you can take to speed it up.
Delete Delete Delete!
Every single one of us is guilty of saving some emails we don’t need. I do it, you do it, grandma does it. I would venture to say that no one but the most OCD about Inbox Zero uses the delete button rather than the archive button.
You can keep an inbox clean by archiving messages you don’t need or filing them away in folders for later reference, and that’s fine. The problem is, those emails still exist. And, sure, emails are small. They’re usually just text, so they only run a few kilobytes each without attachments.

Still, these add up over time. If you’re getting hundreds of emails per day, your archives can quickly add up to gigabytes. Any program that needs to access gigabytes of data every time it starts up is going to slow down over time.
One solution to this is to start deleting emails you no longer need. I recommend going back and purging anything you know you don’t need or you’ll never access again. Those Christmas party invites from 2005? Delete! Newsletters that have been piling up? Don’t be a hoarder! Get rid of it.
The only exception here is when you’re operating in a field where data archives are required. Law firms in particular need to maintain records for anywhere from 3 to 10 years, If not longer in special cases. Deleting spam messages probably won’t come back to bite you, but you don’t want to delete specific information a legal case needs to reference down the road.
Split the Archive
Sometimes you don’t have much to delete. Sometimes you delete a lot, but you still have a lot left over you need to keep for one reason or another. That’s fine; you can keep the emails archived, but move older messages to a different archive.
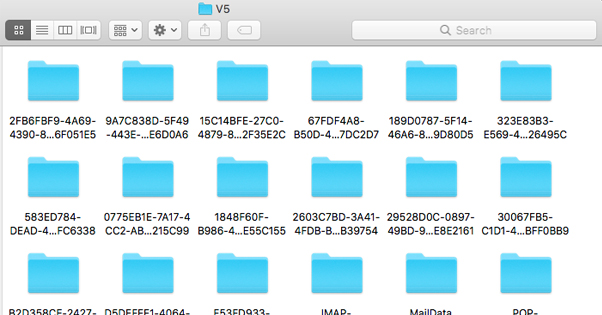
You should be able to find your Apple Mail archive folder fairly easily. Open Finder, choose Go, and Go to Folder. Type ~/Library/Mail/V5 and hit Go. This should take you to the folder storing all of your mailboxes, each of which is a .mbox file. Find the archive mailbox and move it to another location.
Now when you use Mac Mail, new emails you choose to archive will be added to a new archive folder. Emails in the old archive will not be accessible unless you move the old archive back, however, so make sure anything you have archived isn’t something you need frequently.
If you want to do some prep work first, you can split your existing archive. Just create a new mailbox and sort emails between them. Personally, I like to create a new archive for each year older than two years ago, and store those archives elsewhere. It’s relatively easy to find something I need, which is rare.
Be aware that doing this might require you to rebuild your mailbox or your mail indexing. Keep reading for more on those steps, as they can help on their own as well.
Disable Attachments
I mentioned that emails are small, but attachments can be quite a bit larger. When you’re opening Mail for the first time in a day, or connecting to sync with your online mailbox, you will need to download new messages. This includes downloading attachments by default. Often, you don’t need those attachments right away. Maybe it’s a CC of something you already have, maybe it’s a newsletter image you don’t care about, or maybe you just want to deal with it later.
One option you have is to disable automatic attachment downloads. You can manually download any relevant attachments when you need them, and save both your hard drive space and your bandwidth.
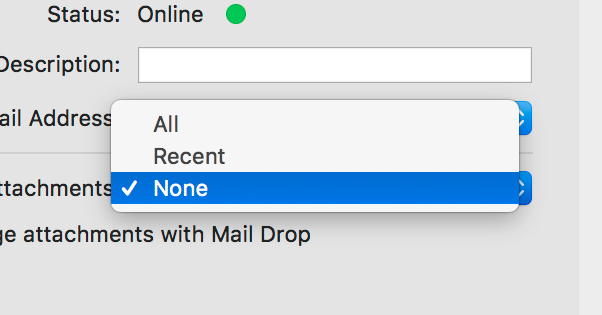
Launch Mail and click the Mail tab in the menu. Find Preferences and choose Accounts. One of the options in the drop-down menu will be Attachments. You can choose an option here; None seems to be the most efficient, though you may prefer Recent if you frequently access new attachments but don’t often need to access older attachments.
Purge Attachments
If your mailbox is packed full of emails and you want to make it smaller, you can delete attachments while leaving the messages on their own. This is a tricky option, because if you do need to access those attachments later, you won’t be able to.
First, decide if you want to back up your attachments. By saving them remotely, you’ll be able to access them later, but it will take up space on your drive. If you want to back up your attachments, in the Mail app, choose File and then Save Attachments. Choose a location and you’ll save your attachments there. Depending on how many you have and how large they are, this might take a while.
Once you’ve backed them up or decided to write them off, it’s time to remove them. Select all emails (or filter them for just emails with attachments) and then choose Message and then Remove Attachments. This will delete every attachment in your mailbox, freeing up a lot of space and making your Apple Mail run a lot faster.
Switch to IMAP
Warning: this is an advanced option that might break everything if you’re in the wrong situation. Exercise caution!
There are two different email protocols commonly in use. One is the Internet Message Access Protocol, or IMAP. The other is the Post Office Protocol, or POP/POP3. They work slightly differently. POP3 has you connect to a server, download all emails locally, delete them from the server (usually), then disconnect from the server. IMAP has you connect to the server, choose what to download locally, process any changes the user makes, then disconnect from the server. Subtle, but different.
POP3 has a few downsides, primarily in that it eats up a lot of space on your local hard drive, requires manual syncs if you make chances across multiple devices, and is fairly unreliable. IMAP is usually a better option unless you’re frequently operating without an internet connection.
If you only access mail while connected to the internet, on one device, and you always need access on the fly, POP3 is your better choice. Otherwise, IMAP may be a better option.
Be aware that if you’re using an email account operated by your company, it might use a specific protocol and will not work if you try to change your account. Following these steps will result in a nice talk with the IT folks about not messing around with your configurations when you don’t understand them.
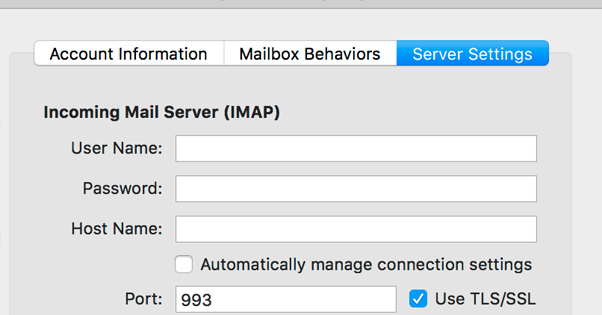
To switch to IMAP, start by exporting all of your mailboxes via Mailbox > Export Mailbox. You will then need to choose Mail > Accounts and delete your existing POP3 account. Mail > Add Account lets you add a new account, where you choose Other Mail Account and fill out your information. You will need to go through some configuration options, which this guide can help you with.
Of course, at this point you have a clean, empty email account. You’ll need to use File > Import Mailboxes to restore your old mailboxes and their contents.
Minimize Flag Usage
Flags are a great labeling system for emails within Apple Mail, though they aren’t quite as robust as Gmail’s labels. The problem comes when you have thousands of flags on thousands of messages in your account. The more flags you have, the memory your mail app requires just to function. It slows down everything from searches and filters to downloading new messages.
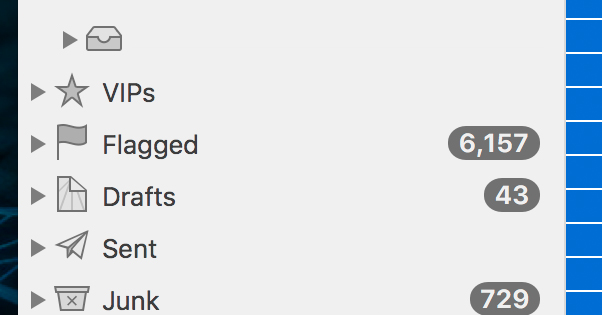
In the Mail app, click Flagged in the mail sidebar, then choose one of your flags. Go through the messages in that flag and decide if they need to remain flagged, and if not, remove the flag. You can choose Flag > Clear Flag on any message that has a flag attached.
If you prefer, you can delete a flag entirely, which will remove that flag from all messages that have it. This can be useful if a flag you were using in the past is no longer necessary, but is still slowing down your app nevertheless.
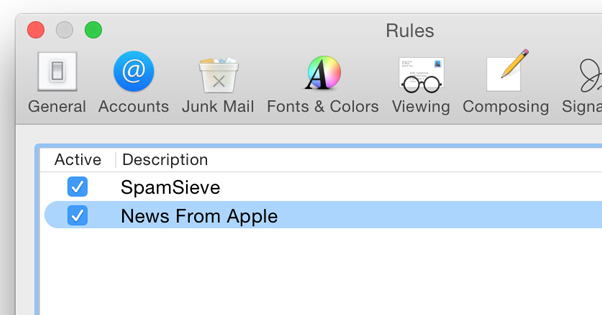
Integrate SpamSieve
Look, I love Mac Mail as much as the next guy, but you have to admit its spam filtering and spam handling are pretty bad. My personal recommendation is to use SpamSieve. This plugin – with a free trial or a $30 full cost – adds a lot of spam filtering that takes a bit of setup, but works very, very well once it’s going. I added it a while back and haven’t looked back.
A good spam filter helps protect you from phishing attempts and virus-riddled downloads, saves you the bandwidth and hard drive space otherwise spent on downloading spam, and helps reduce inbox bloat. It’s an incredibly good piece of software and I highly recommend it.
Rebuild your Mailbox
One or two of the steps I’ve mentioned above have the potential to mess up your mail index. Think of it as if someone took a few million websites and moved their domains. Google would need to re-index those websites to maintain accuracy, otherwise people who find those sites in search would end up at broken pages. It’s not a perfect analogy, but whatever.
Rebuilding your mailboxes and reindexing them can help remove errors and inconsistencies, as well as potential corruption. Start with the simple steps: delete anything in your deleted items and spam folders, delete anything you don’t need, and make sure you’re using the latest version of Mac Mail.
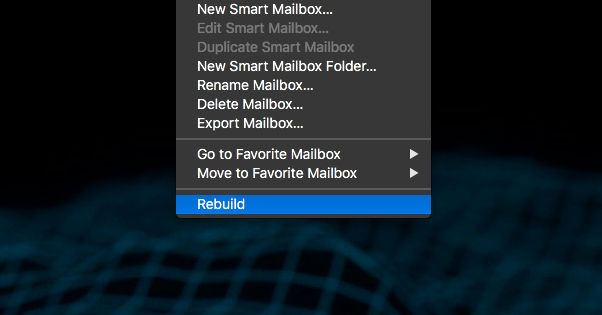
In Mail, choose a mailbox and then find the Mailbox tab at the top. The bottom option on that tab will be Rebuild. Click it and let it work. This can take anywhere from a few minutes to a few hours, depending on how large the mailbox is, so walk away and let it work. Repeat this step for every mailbox you use.
Next, reindex your messages. Quit out of Mail and then navigate to ~/Library/Mail/VX/MailData, where X is whatever the most recent number is for your version of Mail. You should see files that look like “Envelope Index-shm” or something similar. Copy these to another location as a backup, then delete them from the original location.
Now, the next time you launch Mail, it will rebuild the index for that mailbox. This, again, can take a long time depending on the size of the mailboxes, so go get a coffee and some doughnuts. Once it’s done, you should have a faster and more reliable Mac Mail.
Disable or Fix Spotlight
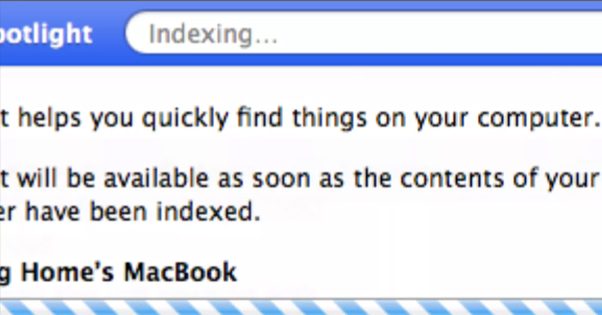
Spotlight is system-wide file indexing, which includes your emails, and helps you with a lot of searching within Apple Mail. Just like mail indexing, your Spotlight index can grow bloated or break over time. You have two options here. You can disable it entirely, or you can rebuild the index.
To prevent Spotlight from indexing your emails, go to System Preferences. Click on Spotlight, then on Privacy. Add any folders or subfolders on your machine to this list and they will be ignored by Spotlight. Drag in your mailboxes folder to prevent email indexing.
To prevent Spotlight from indexing anything at all, click the + in the lower left of the privacy tab and choose your main drive. Spotlight will warn you that you are preventing it from searching your drive as a whole. Agree to the warning and you’re good to go.
To rebuild the Spotlight index, do what I just mentioned, adding your whole drive to the Privacy tab. Then remove it. Spotlight will need to re-index your drive to make sure everything is accurate. This will likely take a long time, so go ahead and go to bed; it’ll be done in the morning, probably.