
How to Check Your Email Spelling and Grammar Automatically
Have you ever sent out an email and, once you saw a reply, spotted a typo in the quoted portion? Have you ever checked your sent messages and found an embarrassing typo, a sentence you failed to finish, an incorrect word choice, or just poor grammar? Have you ever spent extra time running your email through Grammarly or another web checking program, just to make sure?
If so, you know well the anxiety of sending something with a mistake in it. Some mistakes are trivial, like typing “aks” instead of “ask”. Some are worse, like swapping out words. Some are even dangerous, if the typo is in the wrong place and changes the meaning of a sentence.
It’s worth your time to invest in a way to check your spelling and grammar in your emails before you send them. Sure, you can export your text into a word processor or web checker, but that’s tedious and time consuming. Instead, find a way to do it automatically. Here are some options.
Browser Built-In Checks
Modern browsers are capable of performing basic spelling and grammar checking options when you’re typing text, be it in an email, a form you’re filling out, or another field. If your browser isn’t already doing this, you may need to enable it.
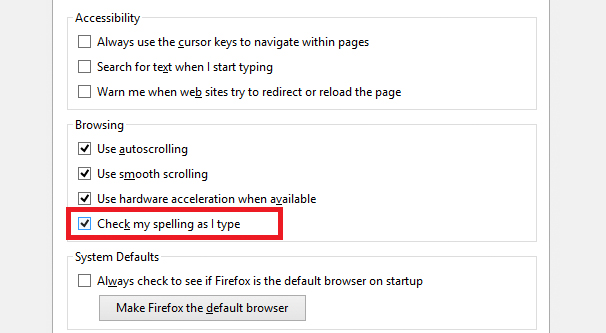
Firefox: Click the menu button and choose Options. Click in the General panel and find the Language section. In that section, make sure the box for “check your spelling as you type” is checked.
You can add a dictionary in Firefox by right-clicking any text box with more than one line in it, then clicking Language, then Add Dictionaries. Mozilla maintains a list of dictionaries and language packs to browse. Pick and add the appropriate dictionaries.
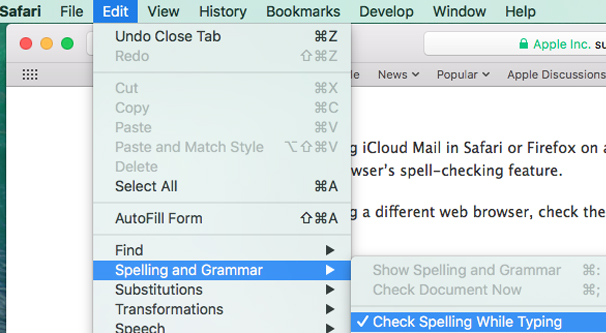
Safari: Click on the Edit menu and find Spelling and Grammar. Click this and check to make sure the “correct spelling automatically” option is selected.
Chrome: Click on the menu bar and click Settings. Scroll down and click Advanced. Find the Languages section and click on Spell Check. Make sure the appropriate language choice is selected and enabled.
NOTE: This option only works for emails if you’re composing emails in a browser-based platform, like Office 365’s Outlook, Gmail, or Windows Live Mail. If you’re composing email in a different program, you will have to pursue other options.
Browser Plugins
Built-in browser spellchecks are fine, but they’re limited. Many of them only do basic spelling rather than an entire library of grammar checks on top of things, simply because of the processing power it would take up. They might not work quite right in every text box, either; sometimes the way a text box is coded means the browser can’t quite read it, and thus can’t check it.
As such, browser extensions can go a long way towards helping you with more advanced checks and suggestions. Here are some you can look into.
Grammarly. Grammarly works as a stand-alone app, or as a plugin for most browsers, including Chrome and Firefox. You install it, and it immediately gains access to their powerful spelling and grammar checking engine. Not only do they highlight mistakes, they rank them based on how much of a mistake they are, and provide several suggestions along with an explanation of why that change makes sense.
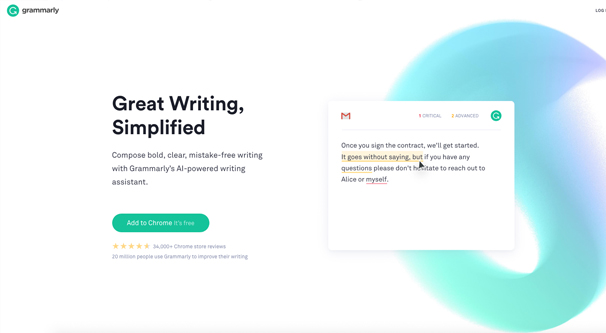
Grammarly is free for personal use, but may require a business license if it’s installed on all of the computers in your business, for example.
Ginger. Ginger’s spelling and grammar checker works in a very similar way to Grammarly. You install a browser plugin, and they will check spelling and grammar as you type. When you make a mistake, it highlights it and offers you correction options. Unlike Grammarly, they don’t explain their corrections, so if you intend to use it as a learning tool, you may want to go with the former. The exception is if you want to use the Ginger Personal Trainer mode, which actually gives you tips for improving your use of English.

Ginger comes as a stand-alone app for Windows or Mac, but also has browser extensions for Chrome and Safari, works for iOS, and has a plugin for Android Keyboard. It is, however, not entirely free. The free version has definitions and the browser plugin, but does not have an unlimited grammar checker, the sentence rephraser, or error analysis. Premium ranges from $5 to $30 per month depending on the length of license you buy at once.
After the Deadline. After the Deadline is a free and open source spelling and grammar checking plugin that claims to use artificial intelligence and language processing to find writing errors and suggestions. You can read about their technology on their website. Don’t be scared by the web design; even though it looks like it was created in 1995, it’s kept maintained and the software is top-notch.

AtD is available as a WordPress plugin, as Chrome and Firefox plugins, and elsewhere. Maintenance of individual versions varies, since they’re each maintained by different groups.
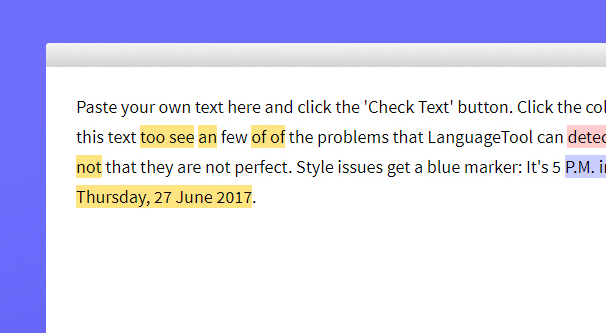
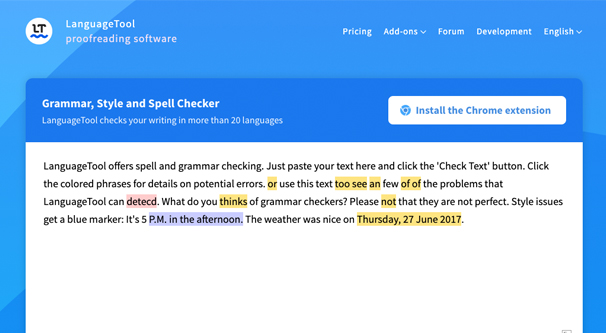
LanguageTool. LanguageTool is a proofreading app available on the web and with an add-on for Firefox and Chrome. They also have add-ons for apps like Google Docs, MS Word, and LibreOffice, as well as others. The free version will only check up to 20,000 characters, though for emails you should never be anywhere close to this. The Premium version costs $5 per month and expands functionality quite a bit, and an Enterprise version gives you API access as well.
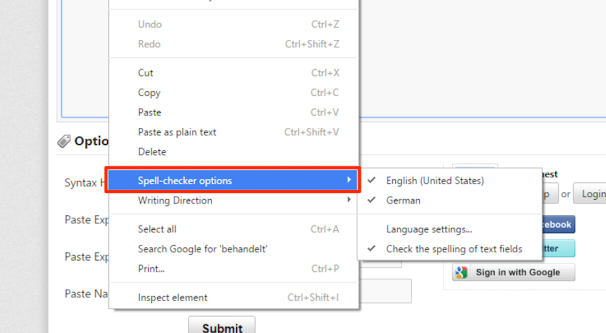
Of course, there are other browser extensions you can use as well. The Chrome Web Store offers a handful of options. Firefox offers dozens, though many of them are specialized language dictionaries for other languages. Check your browser’s app store or extensions browser to find their options.
Built-In Tools
Email clients also tend to have spelling and grammar checks built in these days, and again, you may simply need to make sure they’re enabled. Here are instructions for common mail apps.
Mac Mail. In Mac Mail, you will need to go to your Preferences menu and find the Composing entry. In that window, find the Check Spelling entry and choose “as I type” from the menu. This may or may not be default behavior, but make sure it’s chosen here.
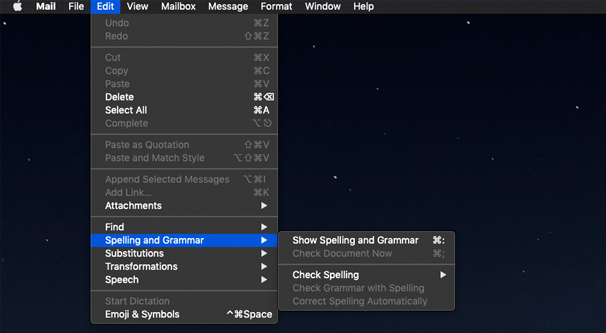
If you’re already composing an email, you can enable spellcheck for that specific email as well. In the Edit menu, click on Spelling and Grammar, and then hover over Check Spelling. Choose While Typing to make sure you’re checking actively.
Mac Mail’s built-in spelling checker is basic as a dictionary check and does not look for grammar errors or misused words, so it will miss errors like their/there or too/to. You will have to get used to checking for those on your own.
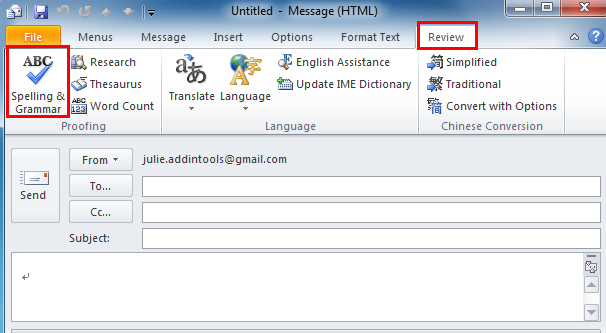
Outlook. Microsoft’s Outlook email client has spelling and grammar checks built in. You can click Review and then Spelling and Grammar to run an active check. You can also add a shortcut to this feature to your Quick Access Toolbar.
Outlook does not have an as-you-type spelling and grammar check easily available, again due to processing restraints. Instead, you can force Outlook to run a check when you hit Send, and if it finds errors, it will cancel sending and will ask you to correct them first.
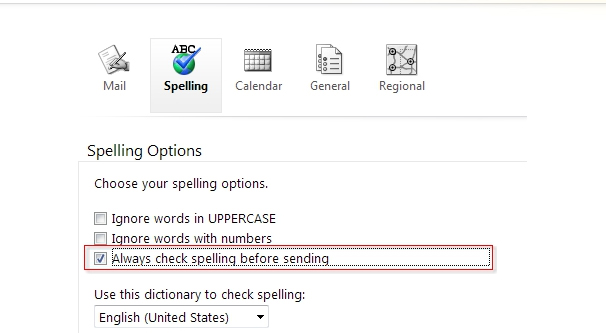
In order to do this, click on File, then Options, then Mail. Under the Compose Messages box, you will see the spellcheck section, with two options in it. The first is “Always check spelling before sending.” Check this to enable the behavior mentioned above. The second option is “ignore original message text in reply or forward.” Make sure this is enabled if you don’t want to have to correct errors in messages sent to you before you reply to them.
Another option is to configure writing style options. In Outlook, open up the Home tab. Click on the New Email button to open a new blank email. Click on File, then on Options. Click Mail, and then look for the Compose Messages section. There, click Editor Options. Find and click Proofing. Here, you will see advanced options for spelling and grammar checking. For example, you can tell it whether or not to ignore all uppercase words, and if they should mark your grammar as you type.
Down under Writing Style, you can click on Settings, and browse through even more advanced options. There are all manner of options here, such as whether or not you want a comma after greetings, if you want it to care about capitalization, and so on. There are dozens of options to customize to your liking. Once you have these configured as you desire, click OK, and then OK again, to exit out of the settings.
Office 365‘s Outlook version is a web client and therefore relies on your browser spelling and grammar check functions rather than having one of its own built in.
It’s worth noting that Windows machines running Windows 8 or 10 can enable a system-wide setting to enable spelling and grammar checks globally. In Settings, look for Autocorrect Misspelled Words and Highlight Misspelled Words. Enable them both.
Note that some versions of Outlook may operate differently, or may have a different set of instructions for enabling spelling checks. The instructions above are for the most common versions of Outlook.
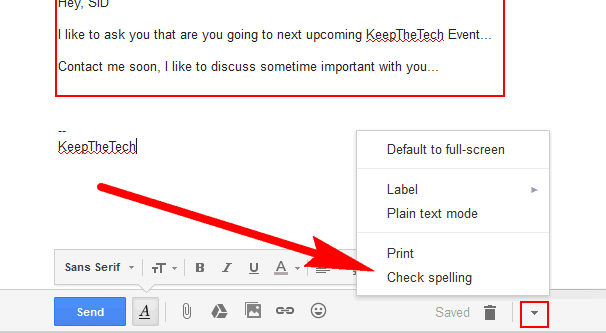
Gmail. Gmail, again being a web client, does not check spelling and grammar automatically. Your browser should check as you type. However, if you want a further review before you send, you can use Gmail’s spelling checker. In the bottom right corner of your Compose window will be a triangle drop-down menu. Click it and click the Check Spelling option. This will do a one-time scan of the contents of your email.
Thunderbird. Mozilla’s Thunderbird app is their answer to Outlook and is a free, open-source email client. As such, while it may not have many features built-in, you can get new features or enhancements to existing features as plugins. I recommend looking for plugins whenever you wish a feature would perform better than it does, but be wary of installing plugins that are not actively maintained.
Thunderbird does have automatic spelling and grammar checks you can enable. In the Tools menu, choose Options. Find and click on the Composition tab. In this tab, choose the Spelling section. There will be a “enable spell check as you type” option. Click to make sure this is checked, and click OK to save and close the options menu.
You can also, like in Gmail, click to scan an email when you’re composing it. In the message, click Options, and then click Spell As You Type to enable checking for that email.
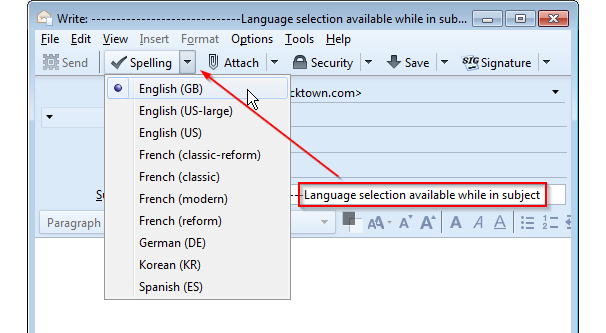
You can also choose a different language for your spelling checks in Thunderbird. In the Tools, Options, Composition, Spelling menu as above, you can choose a different language.
Your Turn
Many of you have deep experience with customizing your email programs.
What have you done to enhance your grammar and spelling checks? If you have another plugin, an alternative app, or even a global program you like, let me know about it in the comments below.