How to Automatically Organize Emails into Folders

Depending on your email program, you may have different options for sorting and filing away emails into folders. I’ll cover a couple of the top options, both native and with third party software.
Outlook Default Sorting
Outlook is one of the most popular business-level email management apps out there, in part because it comes default with Windows, meaning it’s not an additional business expense. I can’t really blame anyone for using it, though personally I feel like there are better options out there.
If you don’t use Gmail or use a self-hosted email, skip on to the next section.
In order to automatically sort emails into folders in Outlook, you need to use rules. Rules are basically filters that scan incoming email and, if that email meets criteria you set up, takes a specific action for that email.
The first thing you need to do, then, is determine what kind of rules you want in place. Here are some ideas:
- Make a rule that filters anything with the word “unsubscribe” and forwards it to a folder for newsletters and service emails.
- Make a rule that takes specific, known senders – like a ticketing system’s internal email address, or your boss, or a particular client – and forwards those messages into a dedicated folder for them.
- Identify formulaic emails like meeting requests and automatically categorize them into a folder for meeting requests or meeting scheduling.
This article is focused on ideas for Gmail, but can give you other ideas for filters you might want to use as well.
Let’s use the newsletter/unsubscribe trigger ideas as an example. To set up this rule, you need to create a new rule.
First, open up Outlook. Make sure you’re signed into the right account and that you’re connected to whatever mail system you need to be connected to, if that’s how your email works.
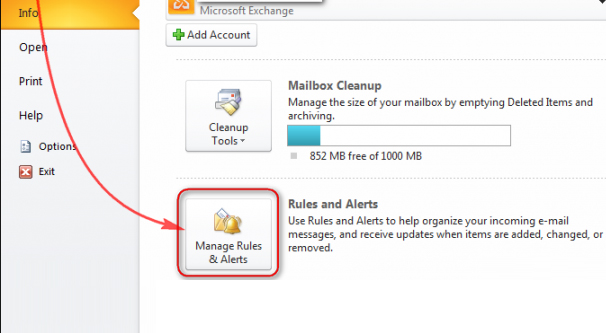
Click on the File tab in the navigation ribbon, and find the Manage Rules & Alerts entry. Click on that, and then click on New Rule. This will open up the new rule dialogue box.
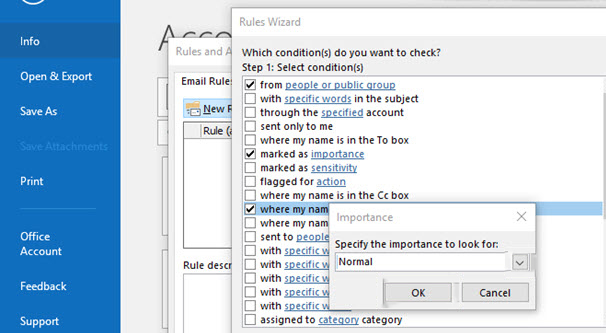
Here you can choose from rule templates or create a new blank rule. For example, Outlook has basic rules like “move messages from a specific sender into a folder” or “move messages with specific words in the subject into a folder.”
In this case, you should click on “Apply rule on messages I receive”, which is in the “Start from a blank rule” category.
Create a name for your new rule. For this example, we’ll use “Newsletter filter”. Under rule options, decide if you want to use the rule to filter everything already in your inbox, or just email moving forward. Click “turn on this rule” to make sure the rule runs once you apply it.
Make sure the rule has “Apply this rule after the message arrives”, and choose a new parameter. Make the rule such that when a message arrives and contains “unsubscribe” in the body, something happens.
Click Next, and you will be asked to determine what happens with the rule. Chose “move it to the specified folder” and choose a folder. If you have a folder prepared, choose that folder. If you do not, create a new folder now. Ideally, that folder will have a descriptive name so you know what it contains without needing to check it.
Apply the rule and wait for it to take action when you receive an email that meets the criteria. You can also test it by sending yourself an email with the keyword, but it shouldn’t be too difficult to wait.
Other rules can be created in a similar way, just choosing different parameters. You can also add exceptions, for example, if you want a specific newsletter sender to filter to a different folder, you can exclude that sender.
Gmail Default Sorting
Gmail does not have folders, but it does have a category system that can work in a similar way. It uses filters, labels, stars, and archives as means of sorting your email into manageable sections.
In order to create a filter to sort and categorize emails into a “folder”, the general process is simple. We will create a filter for incoming email that meets certain criteria, choose an action for what will happen to that email, and create a new label for that email.
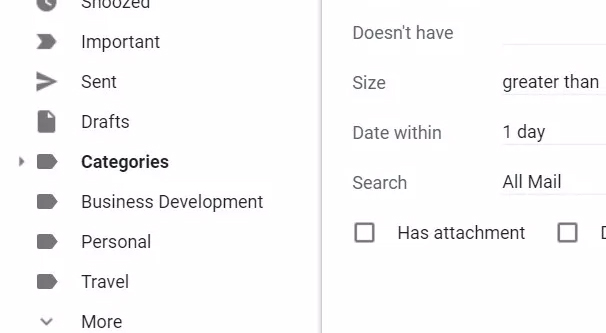
To access your “folders”, you will need to use the left-hand sidebar in Gmail. You have your normal selection of categories, like Inbox, Snoozed, Important, and Spam. Below that, you will see Categories, and in those categories you will see any labels you have created. If you have not created any labels before, you might not see any.
To customize which of these categories are visible, go into your Gmail Settings. To do this, click on the gear on the upper right corner of the inbox. Click on the Labels tab, and you will see all of the possible categories you can have visible. Choose to show or hide the ones you want to change. For example, if you don’t want to see a category for whatever Gmail has determined is Important, you can hide that category.
Now let’s use the same example from above, creating a filter for anything with “unsubscribe” in the body of the email and filtering it to a “newsletters” category.
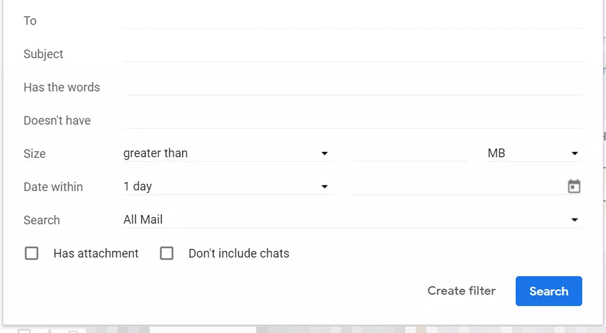
First, click on the search box at the top of Gmail’s interface. Look for the drop-down triangle in the right corner and click it to open advanced filter settings.
In this box, you will be able to see a variety of different options for sorting email. In our example, you want to add “unsubscribe” to the box “has the words”. You can also create exceptions or specifics to narrow this rule, for example, if you want to exclude a certain brand you can add that brand name to the “doesn’t have” box.
Once you have chosen a set of options, click on Search to verify that this search finds the emails you want and excludes emails you don’t want. Once you’ve verified this, click on the drop-down again and then click “create filter” at the bottom.
Now you have to choose a set of options for what happens to the email. In our case, we want two.
- Skip the Inbox (Archive it). This option makes sure that the email is moved from your inbox to your “folder”. If you don’t choose this, the label will be applied, but the email will still be in your inbox, which defeats the purpose of categorizing and sorting it.
- Apply the label: Choose label. This has a drop-down box where you will choose a label for your search results. You can choose a label you have created before, or you can click “New label…” and specify a new label. You can manage labels from the settings menu above later if you want.
Optionally, you can also choose “also apply filter to matching conversations.” This will run the filter on your entire email archive and will filter out everything that matches that description into that category. Note, however, that if you have over 250,000 emails in your account, this action will not be available. Inbox categories will not work on such large email accounts.
Once you have your actions chosen, click Create Filter. Repeat the process for as many different “folders” as you want. You can also create different sets of filters that file email away into the same “folder” by choosing the same label in the actions tab.
Third Party Alternatives
If you’re using another email system I didn’t mention, there are likely a similar system of either rules or filters that you can use, since most email systems mimic one of these two setups.
For example, here is a good set of instructions for creating filters and folders in Mozilla Thunderbird, one of the primary open-source mail alternatives. This system works in much the same way as Gmail filters or Outlook rules, but has folders to sort email into.
Additionally, you can often use a third party email management app or platform to sort and categorize your email. Here are a handful of options you might consider.
1: SaneBox
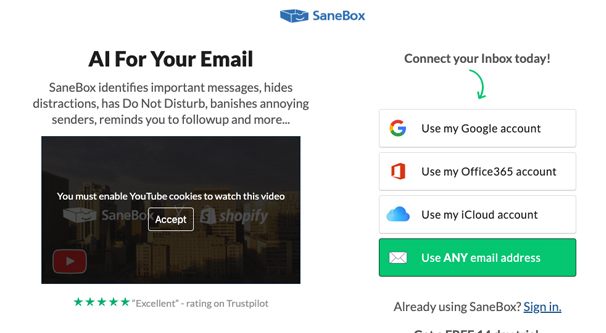
SaneBox is an automatic email categorization engine that works with Gmail, Office 365, iCloud, and any other email address you can log into it with. It adds SaneBox folders to your email account when you set it up, and then automatically sorts email for you. Basically, it categorizes email into two folders: important and non-important. Important email is chosen based on SaneBox algorithms, simple filters like the “unsubscribe” trick, and based on personal input from you when you configure the system. If an email is mis-categorized, tell them and they will adjust their filters for your account.
SaneBox is a good option if you just want a simple filter that will pull out the important email and leave everything else you don’t really need for later. However, if you do need a range of different, specific folders, this isn’t a good option for you.
Additionally, SaneBox is not free the way adding rules to your account is free. You will have to pay somewhere between $7 and $36 per month depending on the plan you want with their service.
2: Clean Email
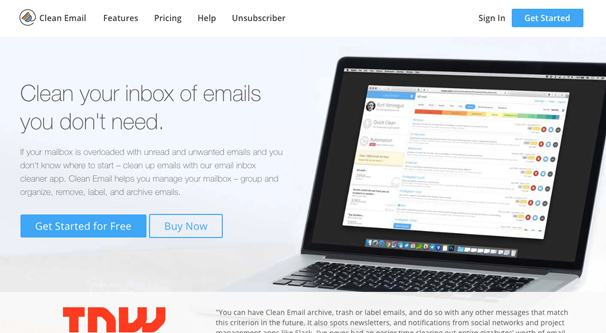
Clean.email is a system that broadly helps you categorize your entire inbox in passes. It scans your inbox and picks out a particular category of email and asks you what you want done with those messages. For example, it will find everything that is categorized as a promotional email and gives you options to filter, store, or delete them. Then it will scan again and present you with everything it categorizes as messages from Facebook and asks you what to do with them. Through this way, it helps you categorize your entire inbox.
Once you have it set up, incoming email will be processed according to the filters you set up through those configurations. As an added bonus, Clean Email has a system to allow you to unsubscribe from emails automatically in bulk.
While you can get started for free, Clean.Email will cost you $30 per year for one email account. You can buy it for multiple accounts at a volume discount as well, for $50 per year for five accounts or $100 per year for ten accounts.
3: Mailstrom
This is an advanced email filtering app that works with Gmail, Outlook, Yahoo, and other email providers. It’s primarily aimed at sorting a backlogged email inbox, but it can have valuable uses for sorting email moving forward as well.
Unlike a system like SaneBox, it does not use some hidden “artificial intelligence” system to sort your emails. Rather, it detects trends with how you use and process your email and helps you create methods for filtering that email based on those trends.
Much like Clean Email, Mailstrom will identify bundles of similar emails and ask you what you want done with them, for past and for future instances of email from those sources.
You can use the system for free in a limited capacity to test it out. It takes a snapshot of 5,000 emails from your inbox and can remove up to 25% of them if that’s the action you want to take. Paid plans use your live inbox, don’t have a removal limit, can load more emails at once to filter, and can create filters for moving forward. The basic plan is up to 200 filters, which is enough for most people, but the higher tier plans can create up to 400 and 1,000, respectively. Plans cost $9, $14, and $30 per month.


