
How to Set Up Autoresponders to Reply to Specific Emails

In a lot of circumstances, autoresponders aren’t the best option for your customer service, sales, or other email communications. Sometimes, though, it’s not a terrible idea. Maybe there are a few problem users whose tickets you can solve with an automatic response and they would be none the wiser. Maybe you’re experiencing a service outage and an automatic response is the best way to keep your customers informed without wasting hours on manual responses.
The way I see it, there are three kinds of autoresponders.
- Autoresponders that reply to every incoming email regardless of context.
- Autoresponders that reply to emails that have specific text contained within.
- Autoresponders that reply to emails that come from specific senders.
The first are incredibly easy to implement; all you need to do is enable vacation mode in whatever email client you’re using. Any typical out-of-office reply will work for this scenario. What’s trickier are the other two, so that’s where I’ll be spending most of this post.
Unfortunately, each email system has their own method for performing these actions. I’ve come up with the methods for several common email managers or clients, as well as a couple other options you might consider.
Autoresponders in Gmail
Gmail has a built-in automatic response system you can use, if it’s something you’re interested in. Their own index and search options allow you to cover all three of the potential scenarios I listed up top.
The easiest to apply is the vacation autoresponder. Simply click the gear icon to go to your settings menu, and under settings, in the General tab, scroll all the way to the bottom. There’s a section called Vacation Responder. Turn it on, choose the first and last day you want it to be active, and compose the email you want people to receive. Make sure you check “only send a response to people in my contacts” so you aren’t sending an out-of-office reply to every single junk message you get.
As for the other two scenarios, you will need to use canned responses. In the past, this was a Gmail Lab, but Gmail has either absorbed or removed most of their labs at this point. Canned responses are part of the main Gmail experience now.
To enable canned responses, go to your settings menu and click the Advanced tab, and click the box to enable canned responses (templates). Next, click the Compose New Email button. Write in the subject line and the body of the email you want to be your template response.
In the lower right corner of the compose window is the three dots button for more options; click it and find the Canned Responses section. There should be an entry called New Canned Response; click it. This will prompt you to name your canned response and will save the current email as a template.
Now, you don’t want to actually formulate this message as a template. If you use [name] or %date or any other wildcard you would fill in later, it won’t be filled properly when the message is sent to someone automatically. I recommend a more generic but complete message.
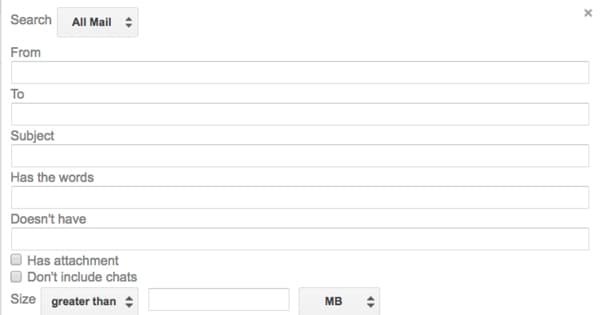
Now you have to set up a Gmail filter. This article has a lot of examples of how to do it. To summarize it, though, simply use the search bar at the top of Gmail’s inbox. If you click the drop-down arrow to see advanced search options, you can see different ways to configure your autoresponder.
- To respond automatically only to specific email addresses, put those addresses in the From field.
- To respond automatically to messages that contain specific text, put the words or phrases in the “has the words” box.
- To further customize your filter, put negative phrases in the “doesn’t have” box.
- To make sure chat messages from Google Hangouts or Google Chat aren’t included, check the “don’t include chats” button.
Run your chosen search to make sure it’s picking up what you want, and if it’s picking up anything you don’t want, further refine your search. When you have the search showing just what you want it to, click the Create Filter button. This will give you a bunch of options you can use to handle incoming messages that meet the search criteria.
In this case, we’re looking for the “send canned response” option. You need a saved canned response, and you need to choose it, click the box to enable the send option, and create the filter.
You can choose other options in addition to sending the response. For example, if you want al incoming messages meeting that criteria to also be marked as read and archived automatically, you can do one or both of those actions with other boxes.
Autoresponders in Mac Mail
Mac Mail has its own version of rules similar to what Outlook has, which you’ll see in a moment. You can find the rules settings under Mail and Preferences. Click to Add a Rule and you can start to configure your autoresponder.
What kind of configuration options can you use? You can choose to respond to every message or only specific messages, based on criteria like the contents or the sender. This covers all three of our scenarios up top.
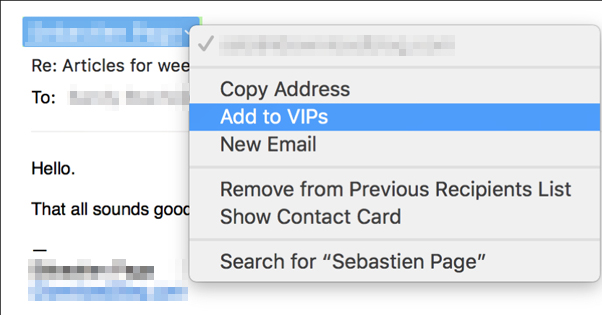
One important option Mac Mail has that other mail systems do not is the ability to mark someone as a VIP. You can choose VIPs as a category for autoresponders, either to have them bypass your autoresponse or to target them specifically.
This is the first part of the rule, but you need the second half; what happens when those messages are received. In this case, click “reply to message” and then customize the message text. This is where, as you might expect, you get to compose the email that will be sent out based on your autoresponder.
Mac Mail will ask you if you want to apply your rule to everything in your inbox when you create it. 99% of the time you should say no. I’ve seen people hit “yes” and cause a message to be sent to hundreds or thousands of emails that can be even years old, depending on how clean they keep their inbox. Usually it’s simply best to put the rule in place starting now, rather than applying it in any way retroactively.
Autoresponders in Outlook
Setting up a vacation responder is more complicated in Outlook than it is in Gmail, but it can be done.
The first thing you need to do is compose your template email for the out of office message. Use the File, New, Mail Message option and choose a plain text format group to make a new message template. Type in your message as you want it to be seen in the compose window and hit Save As. You want to save the message as an Outlook Template or .oft file.
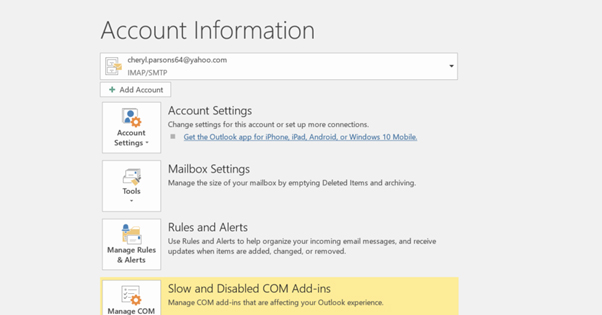
To actually put the template into use, you need to set up an email rule. Rules are similar to filters in Gmail; they let you control certain ways of handling incoming email. In this case, you want to click Tools, rules and Alerts, and New Rule. Start a new blank rule and check any message sent to your email address, or whatever other criteria you want.
You need to specify something for the rule to do, so in this case, click “reply using a specific template.” Choose the template you want, and you’ll start sending emails in response automatically.
You may also be able to use the Automati Replies system, depending on your iteration of Outlook. You can see instructions on how to do that here.
Now, there’s one major quirk with this. It only works while your email client is on and your computer is connected, unless your email system is managed by an Exchange server. You will probably need to talk to your company IT department to learn if that’s the case or not. If you don’t have an IT department, you probably don’t have an Exchange server either, so you need to keep your email client open and connected for your responses to work.
If you want to send responses to specific senders, or to groups of senders, or to emails that contain specific words, you can do that with rules as well. However, you will need to create a rule using the rules wizard instead of the basic rules options. Create a new rule and apply the rule to messages you receive. Under the conditions box, you can choose options like “from people or public group” or “with specific words in the subject or body”. These are just some of the options available, so look through everything Outlook offers and see what might work for your situation.
As you progress in creating the rule, you will need to specify the email address or addresses, or the specific words or phrases you want to be flags in your rule. From there, you can respond using a template you created just as you did before.
Automation Engines
Another option you have is to use an automation engine to manage your autoresponders. There are benefits and drawbacks to this, as you might imagine. For one thing, it means you’re allowing a third party app to access your email. In some businesses this can be a major security violation, and for others it might not be possible due to locked down APIs or authentication access.

On the other hand, it gives you the additional flexibility of changing your automation recipes at any time, and also the potential ability to add more steps to a recipe or create another, similar recipe whenever it might be necessary.
The two most common automation engines you can use are Zapier and IFTTT. They both have recipes for Gmail to send and receive automatic replies. Obviously you don’t specifically need this, since Gmail can do it on its own, but here you go. This is the Zapier recipe, or Zap, as they call it. This is the IFTTT version.
Alternative Systems
Depending on how much of a change you’re willing to implement in either your personal process or your business email system, you can use some third party email managers to handle everything from mailing lists to autoresponders.
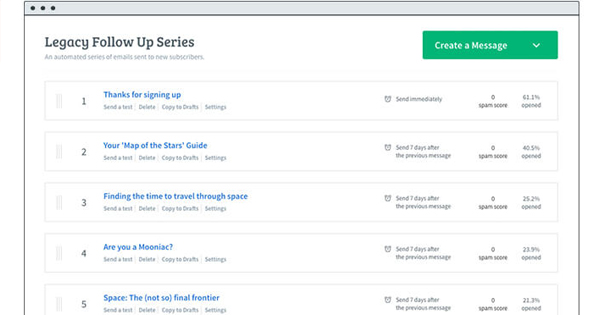
Aweber has autoresponders you can configure. It’s mostly aimed at sales; when someone signs up, the responder sends them a message, and can continue sending them messages on a delay afterwards. You can also set up responses to incoming messages, though you may want to look into the Aweber help center for specific instructions on how to do so.
Mailchimp, one of the more common email managers, has a full set of automation features. These range from triggered messages welcoming new subscribers or wishing subscribers a happy birthday, to cart recovery and responses.
The trick and the trouble with systems like Aweber and Mailchimp is that they are much more focused on business email management, subscriber conversion, and general mailing list tools than they are on more personal-level automatic responses. That’s not always useful for what you might want, so you may end up needing to go for a basic Gmail or Outlook system anyway.
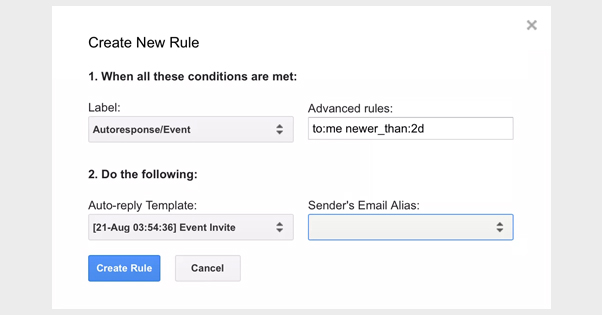
If you want to tweak an existing system rather than convert to an entirely new email manager, you can use something like a plugin for Outlook. This app gives you more advanced features for Outlook’s rule engine, with more detailed rules you can set for specific situations and specific incoming emails. It costs money, though, and I haven’t personally vetted how well it works.