
The Ultimate Guide to Combining Multiple Outlook Inboxes
Outlook has a lot of features to split your inbox up into different inboxes, which you can use for different purposes. It also has tools to merge inboxes into one, so you can manage everything from one place. It’s not difficult to set up, but figuring out exactly which method you need to use can be a little tricky. This guide should help. Just pick what task you’re trying to accomplish, and follow the steps.
It’s worth noting that there will be different methods of combining inboxes, with varying levels of complexity and effectiveness. Outlook doesn’t provide an easy merge feature, which is a bit of a disappointment, but I suppose keeping everything segmented is a powerful organizational tool for businesses. Regardless, you have several options. Just remember that many of them, particularly the ones that work with Outlook Rules, will only apply moving forward. To create a unified inbox with all of your archived mail, you will need to merge PST files as well, which is a whole other issue.
Combine Multiple Folders into One Inbox with Rules
Maybe at some point in the past you set up a bunch of filters or rules to segment your Outlook inbox into multiple folders, and now you want them all combined back into one. You can do this to cease filtering items into folders, or you can move everything from an existing folder into an archive folder or into your inbox.
Personally, I feel like having everything in one inbox is easier, because Outlook’s search is good enough to find anything I’m looking for. Though, I also semi-aggressively delete old messages I know I won’t need, so it’s easier to manage when I don’t have 100,000 messages a year clogging up the archive.
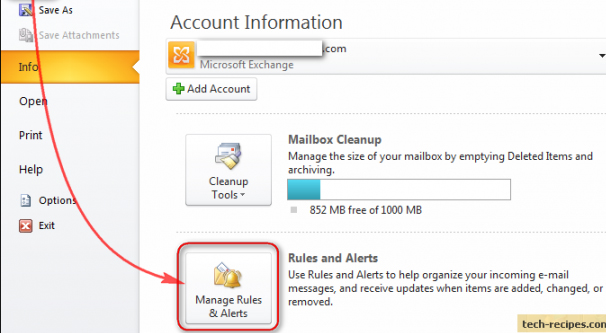
The first thing you should do is go into your outlook rules by clicking on File and then Manage Rules. Look for any rules in the list that filter incoming messages into the inboxes you are planning to delete. Select and delete the relevant rules. Since the folder will no longer exist, Outlook may freak out and handle those emails poorly, or it may create the folder if it doesn’t exist. I’m actually not sure on their default behavior, to be honest. Still, it’s a good idea to remove those filter rules if you’re removing their destination.
Next, go into the folder you want to merge and make sure your view is showing you everything. Highlight everything in the folder and right click. Choose Move and choose your inbox or archive folder as the destination to move those messages. You may have to wait a moment as Outlook reconfigures those locations. You may also have to repeat this process numerous times, if Outlook isn’t showing you everything that appears in the folder. This happens because of view limitations, so you will have to repeat this process several times for especially large inboxes.
Once the folder is empty, you can then delete it. Just note that if the folder is specifically an inbox folder, rather than a subfolder, you will not be able to delete it. Every mail account needs a primary inbox. Still, removing all of the other inboxes is a good way to merge everything and make searching easier.
The Search Folder Workaround
Maybe you want a dynamic “inbox” that isn’t really an inbox. For example, an inbox that shows you everything you’ve received in the last week can be quite handy. Older messages drop out and go back to your main inbox, while newer messages remain in the display folder.
The way to do this is with a “search folder”, something Outlook introduced in the last few years. Outlook search folders are basically just saved searches, configured to appear as folders. They aren’t actually folders, they’re just shortcuts to performing the same search again. This is how they can be dynamic.
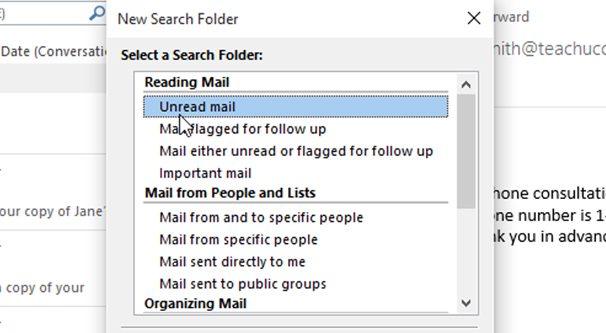
To set up a search folder, open Outlook and click on the Folder tab across the top. Click on New Search Folder and a dialogue box will open up that allows you to configure your search. You have a variety of different options here. You can choose if you want only unread messages, messages that are flagged, messages that are labeled important, and so on. You can also choose specific senders, specific recipients, and organizational structures as well. You have a lot of options, so make sure to configure the search the way you want it.
Since we’re talking about a combined inbox here, one such option you can use for configuration is to choose all mail that has arrived in the last week or last month, from any sender and to any recipient. This will give you a dynamic “recent items” folder that merges all of your inboxes.
Once you have the search configured the way you want it, save the folder. This will create a “search folders” section in your inbox list, with your saved search as one of those folders. Now whenever you want to view this “recent items” inbox, or whatever saved search you’ve chosen, you can simply click the folder.
If you’re using an older version of Outlook that doesn’t support search folders, you will still be able to use this technique, you just won’t be able to create a folder-based shortcut. Unfortunately, you simply have to run the search again each time you want to view this inbox. It’s inconvenient enough I would recommend upgrading your platform.
Merged Folder Rules
Another option you have is to use more rules, rather than less, to achieve a unified inbox. This works best if you have multiple email accounts managed by the same Outlook installation.
Pick one of your email accounts and create a new folder, named Unified Inbox. Next, find the Manage Rules section under File or on the home tab of the main Outlook ribbon. This brings up your email rules dialogue box.
Start a new rule with “apply rule on messages I receive.” Click to check “through the specified account” and click to choose which account you want specified. Add the account you used for he Unified folder, then click OK.
As for what you want the rule to do, tell it to move the item into the specified folder, and choose the Unified Inbox folder you created earlier. This will forward every message that arrives in that account into the one unified Inbox. You can then repeat these steps to create the same rule for each other inbox you have, all pointing at the same Unified Inbox. All mail you receive will now be forwarded to that centralized inbox for your management.
For ease of access, in your main Outlook screen, find the Unified Inbox and drag it into the Favorites section. This way it will always appear at the top for easy access.
Changing POP3 Account Settings
Another option you have for merging different email inboxes is to change your account settings and changing the delivery location for each account to the same inbox folder.
To do this, you need to open up Outlook and then find the Account Settings wizard. Under File, click Account Settings, and then Email. Find the account you want to change. This works best with POP3 accounts. Click the “change folder” button and specify the new destination folder for this account. It can be an existing inbox or you can create a new folder through this wizard.
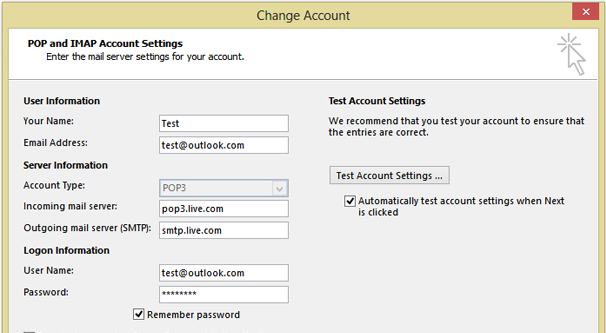
Repeat this process for each account until they are all delivering mail to the same folder. You will not be able to do this with IMAP email accounts, but it works with both POP3 and Exchange accounts. Also, note that this will only deliver new incoming messages, it will not transfer over old messages.
To transfer old messages into a unified account, you will need to use some kind of PST merging tool. There are many such tools out there – this is one example – that are either cheap or free to use.
Be aware that if you’re merging two PST files into one, you may run into issues. Increasing the size of a PST file will make Outlook run a lot more slowly, and if it’s too large, you may encounter issues with opening it at all. You may also want to split your PST, or perform some cleaning and reduce the number of emails you’re archiving before you merge.
Merging IMAP Inboxes
Unfortunately, there’s no easy way to merge Outlook inboxes if one or more of the email accounts you’re using are IMAP. The easiest option you have is to set up a forwarding rule. Such a rule will automatically take any messages sent from one account and forward them to the other account. You may need another inbox rule to then file them into the specific inbox you want to use.
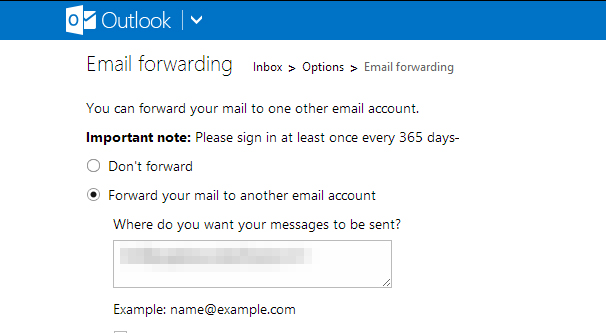
Setting up such email forwarding is quite easy. In settings, simply navigate to the mail forwarding option and choose a new email to receive your forwarded messages, on the web interface. If you’re using Outlook’s stand-alone app, you will once again need to set up a rule. Go to the rules settings menu and create a new rule. Tell it to choose all new incoming messages, and for your action, forward them to your primary email account.
Other Third Party Options
There are a bunch of different plugins for Outlook out there, many of which can give you similar options to merge emails but with a cleaner interface and fewer steps.
Kutools is one such app. If you choose to use this plugin, your instructions are pretty easy.
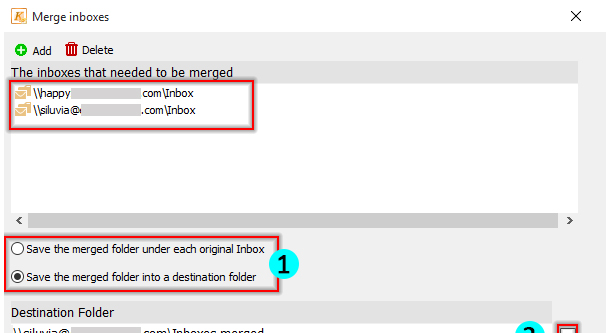
To merge multiple inboxes, use the Kutools merge inboxes tool. You can click the “add” button to choose the inboxes you want to merge, and choose if you want each inbox to mirror the other or to choose a specific inbox as the destination. You can choose a date range to merge old emails, or just merge them moving forward. Click OK, and choose your destination folder.
The link above will guide you through both an account settings change and the merge folders options, with screenshots to guide you.
Mailbird is another app you can use. It’s actually kind of its own email client, rather than a plugin for Outlook, but it serves your purposes to create a unified inbox. Simply download the app and link up all of your different email accounts, as well as any other integrations for messengers you want to use. This can include Twitter DMs, Facebook Messenger, and even other integrations like Asana and Dropbox.
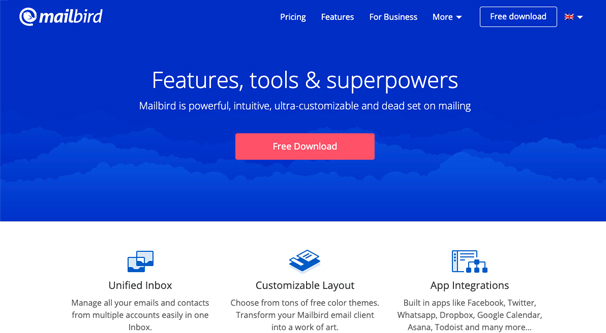
Mailbird has a ton of useful features, but foremost among them is the unified inbox. When you link an account to Mailbird, it imports all of your messages and your contacts to merge into one inbox. You can then segment and manage it as robustly as you want.
Mailbird isn’t free, but it’s cheap enough that pretty much anyone can use it. The personal account can be purchased for a one-time fee of $100, or billed on an ongoing basis for just over $3 per month. You can also use a business version for about $7.50 per month.
There are dozens of other email management platforms you can use, but they kind of go against the spirit of telling you how to arrange a unified inbox in Outlook, because they’re stand-alone platforms. Nonetheless, if you would like to recommend your favorite unified email platform in the comments, I certainly won’t stop you.